
Solving Setup Meltdowns: A Smooth Guide to Printer Commissioning
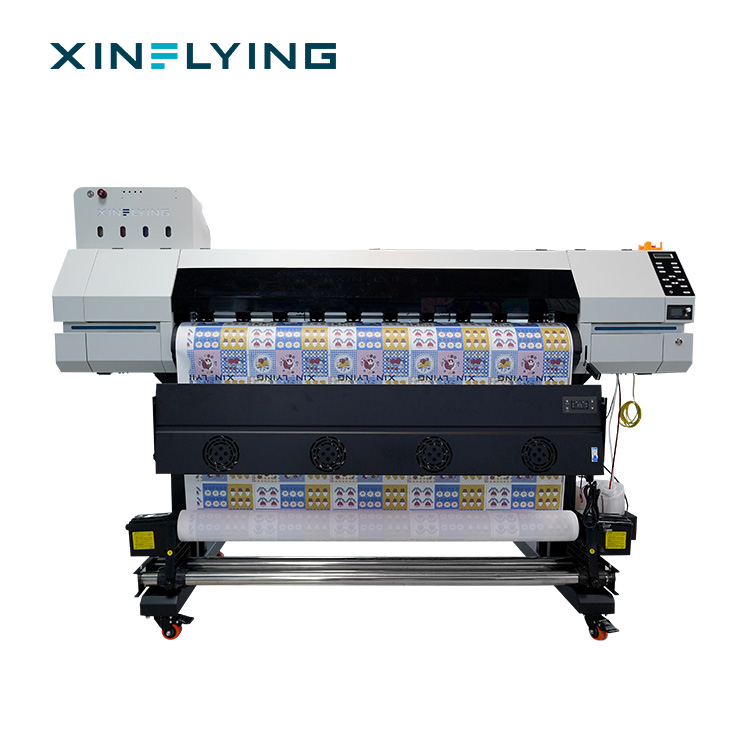
A sublimation printer rarely fails because the first nozzle check is difficult. The higher-risk window is earlier: after the crated XF-H1301X-1I32A1 is moved into place and before the power button is pressed. A missing protective earth, a mismatch between the site supply and the nameplate, or an LVD document that does not match the exact model can turn a routine installation into a setup meltdown.
This commissioning guide is written for technicians, installers, and production engineers who need a repeatable pre-power sequence. It focuses on the XF-H1301X-1I32A1, a 130 cm digital textile sublimation printer from xinflying, the brand of Guangzhou Xin Flying Digital Technology Co., Ltd., a digital printing equipment manufacturer founded in 2010. The method is grounding-first: verify the earth path, verify the supply, verify the LVD documentation, and only then move to ink, RIP, and the first test print.
What a setup meltdown actually is
In commissioning, a meltdown is not a dramatic machine failure. It is a chain of small stoppages: the breaker trips at first power-on; the display is dead because the supply configuration is wrong; the technician cannot find the earth test point; the certificate on file names a different model; or the first print is started before the room is stable. Each item is easier to fix before power than after the machine is full of ink and transfer paper.
The XF-H1301X-1I32A1 adds a specific constraint: it is a compact 130 cm roll-to-roll textile printer with a 2 kW power requirement and a 110/220 V, 18 A/9 A, 50–60 Hz supply specification. Those values are not interchangeable with a larger 180 cm or 190 cm model. A checklist copied from another machine can create a false sense of safety.
Why grounding is the first commissioning check, not the last
Protective earthing does two jobs in a digital textile printing environment. It gives fault current a low-resistance path back to the supply, and it keeps the machine frame at a safe potential when a conductor or component fails. In a workshop with heat presses, dryers, humidifiers, and several printers on one distribution board, the earth path is part of production safety, not an electrical detail left to the end of the day.
The LVD certificate and the on-site earth check answer different questions. A passing LVD certificate is evidence about the machine's design, construction, and technical documentation against the cited standard. It does not prove that the earth pin in the customer's socket is connected, that the building's protective conductor is continuous, or that the printer was wired to the correct terminal. For that reason, grounding verification belongs before power-on, and the certificate belongs beside the commissioning record.
XF-H1301X-1I32A1 commissioning data
The model in this scenario is the XF-H1301X-1I32A1, a 130 cm (1.3 m) digital textile printer for sublimation transfer paper. Its commissioning profile is intentionally narrow: one Epson i3200-A1 printhead, CMYK ink, Maintop RIP as standard, an external constant-temperature automatic drying system, and a 2 kW power requirement. The machine is built with aluminum alloy, stainless steel, and ABS plastic.
The supply and environment values below should be checked against the nameplate and technical file before the machine is connected. They are the baseline for the checklist that follows.
| Specification | XF-H1301X-1I32A1 data |
|---|---|
| Print heads | 1× Epson i3200-A1 |
| Print width | 130 cm (1.3 m) |
| Print speed | 4PASS 28 m²/h (fastest) |
| Ink | CMYK sublimation ink |
| Media | Heat transfer paper |
| RIP | Maintop (standard) |
| Drying | External constant-temperature automatic drying system |
| Power | 2 kW |
| Power supply | 110/220 V, 18 A/9 A, 50–60 Hz |
| Operating environment | 20–35°C; 45–65%RH |
| Machine size | 2220×870×1540 mm |
| Net / gross weight | 140 kg / 200 kg |
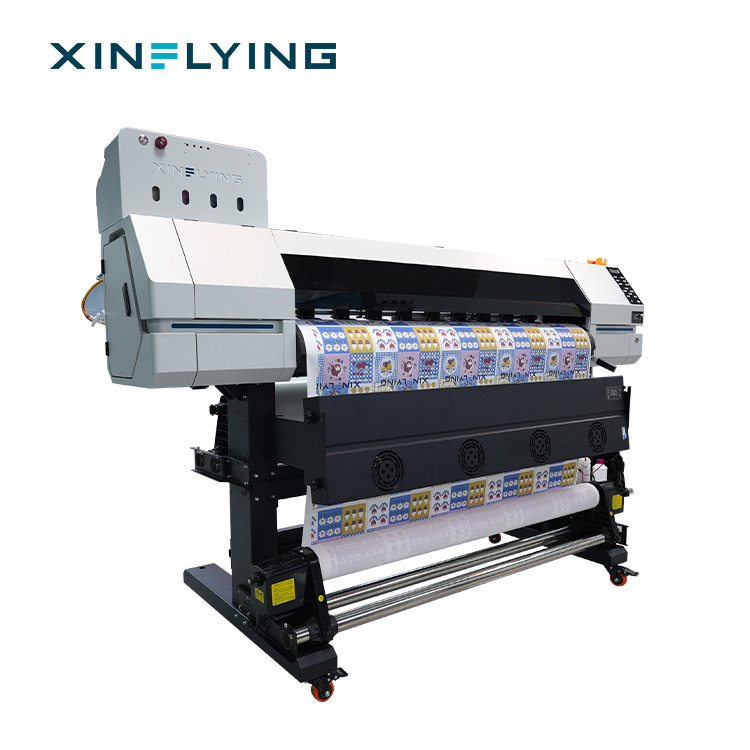
Pre-power grounding checklist for the XF-H1301X-1I32A1
Use this sequence before the printer is connected to the site supply. If any step fails, stop and correct it. Do not use a test print to diagnose a grounding fault.
- Isolate and document. Lock out the circuit. Record site voltage, breaker rating, socket type, and machine serial number. Photograph the nameplate before any cable is connected.
- Inspect the power inlet and cord. Look for transport damage, moisture, loose terminals, crushed cable, or a missing earth pin. Do not modify the plug to fit a socket; correct the site connection instead.
- Identify the protective earth point. Confirm the protective earth terminal on the machine and the earth pin on the plug. Protective earth is separate from neutral and must not be treated as a spare conductor.
- Test earth continuity. Use a low-resistance continuity tester between the plug earth pin and bare metal on the frame or the marked earth stud. Test more than one exposed metal point. Record the reading and compare it with the limit in the machine documentation and local electrical code.
- Probe bare metal, not paint. A reading taken through powder coating or anodized panel is not a valid earth check. Use the dedicated earth stud or a clean, unpainted contact point.
- Check accessible internal earth connections only if authorized. A qualified electrician should verify earth wires to the frame, power supply, and control box. Do not disturb wiring beyond the approved commissioning scope.
- Confirm neutral and earth are not bridged. Do not use neutral as a substitute earth. If the site uses a distribution arrangement that affects protective earthing, have a qualified electrician confirm the arrangement before connection.
- Verify supply voltage and current. Confirm that the site supply matches 110/220 V, 18 A/9 A, 50–60 Hz and the delivered machine configuration. Do not assume that a dual-voltage label makes the printer plug-and-play on any socket.
- Check circuit protection. Confirm the breaker and residual current device are suitable for a 2 kW printer and are not shared with an overloaded circuit. Avoid daisy-chained extension leads for commissioning.
- Prepare the room. Confirm 20–35°C and 45–65%RH, a clean and dry floor area, and clearance around the 2220×870×1540 mm machine. Allow space for the external drying system and transfer-paper roll.
- Recheck after moving. Moving the machine can loosen a terminal or stress the cord. Repeat the earth continuity check after final positioning, not only at the loading dock.
- File the evidence. Photograph the test points, record meter readings, attach the LVD certificate, and sign the commissioning sheet. A pass without a record is difficult to audit later.
Stop rule: if protective earth continuity is open, intermittent, or higher than the documented limit, do not energize the printer. Correct the earth path first. Power-on is not a diagnostic step for a suspected earth fault.
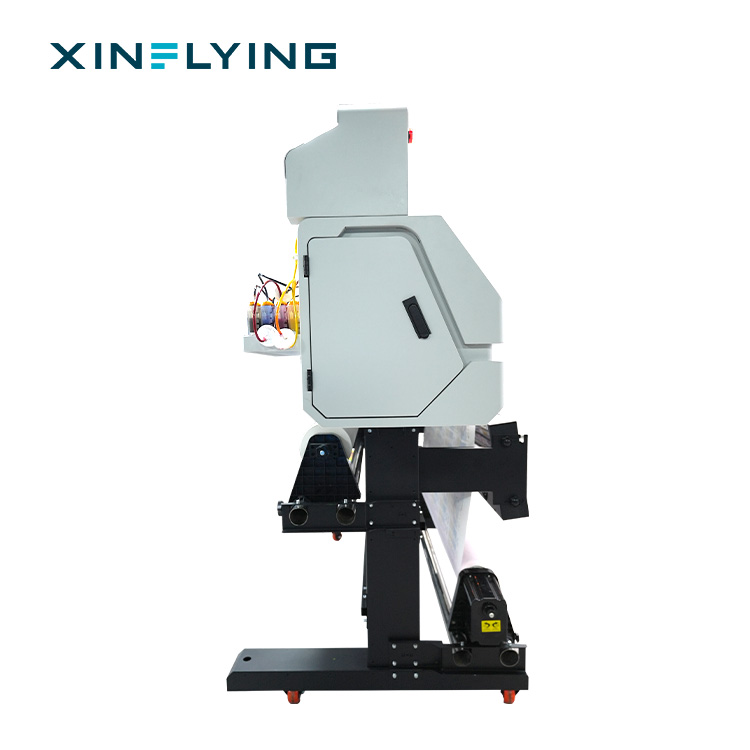
Linking the earth check to the LVD certificate
For the XF-H1301X-1I32A1, the LVD review should be a document-to-machine match, not a folder check. The certificate should identify the exact model, the manufacturer or issuer, the applicable standard edition, and the serial or batch reference where the document provides one. Where the technical file cites EN 60204-1:2018/A1:2025, the commissioning record should use that edition as the reference for the electrical equipment check and should not substitute an older edition without an approved document trail.
A passing LVD certificate supports the compliance file, but it does not replace the measured protective-earth result. The practical handover pack has three parts: the certificate and test documentation for the model, the site earth-continuity record from the installed machine, and a signed note that the supply voltage and protection match the nameplate. If the certificate model, the machine label, and the invoice description do not agree, pause commissioning and resolve the mismatch before power-on.
Step-by-step commissioning sequence after the earth check passes
- Position and stabilize the machine. The XF-H1301X-1I32A1 measures 2220×870×1540 mm and weighs 140 kg net, 200 kg gross. Use suitable lifting equipment, level the feet, and keep the frame clear of walls and storage racks.
- Let the machine acclimatize. If it has been transported through cold or humid conditions, allow it to reach room conditions before power. Stable 20–35°C and 45–65%RH conditions reduce condensation risk and support consistent ink performance.
- Repeat the isolation checks. After positioning, confirm the earth path again. Check that the power cord is not pinched under the frame and that the plug is fully seated.
- Connect to the correct supply. Use the site supply that matches 110/220 V, 18 A/9 A, 50–60 Hz. Use the correct plug and circuit protection. Do not use a travel adapter or a temporary extension lead as a permanent connection.
- Power on without production. Observe the display, fans, and safety devices. Do not start ink filling or a print job until the electrical checks are complete.
- Prepare the ink system. Use CMYK sublimation ink and follow the supplier's ink-fill procedure. Check that ink flows correctly and that lines are not left with air or dry ink.
- Install and configure Maintop RIP. Use the standard RIP for the model and select the correct printer configuration and color profile for the intended transfer paper and fabric.
- Run a nozzle check. Inspect for missing nozzles, then clean only as required by the printer procedure. Record the nozzle-check result before the first production test.
- Print a test file on transfer paper. Check alignment, color, and paper feed. Do not move directly to a large order before the test print is stable.
- Record handover settings. Save the RIP profile, supply readings, earth-continuity result, nozzle-check image, and test-print result in the commissioning file.
Common commissioning symptoms and first checkpoints
| Symptom | Likely commissioning issue | First checkpoint |
|---|---|---|
| No display or no power | Supply mismatch, open circuit, or protection tripped | Stop. Verify site voltage and breaker state. Do not bypass the earth connection. |
| Breaker trips at power-on | Earth or neutral fault, damaged cord, or moisture | Isolate the circuit. Have a qualified electrician test the installation. Do not repeatedly reset the breaker. |
| Earth continuity fails | Loose terminal, painted contact point, or damaged cord | Re-terminate to bare metal or replace the cord, then retest. Do not power on. |
| Printer powers on but no ink flow | Ink system not primed or air in the line | Follow the ink setup procedure and confirm continuous ink flow before printing. |
| Missing nozzles or lines | Printhead condition or print settings | Run a nozzle check, clean if needed, and review the selected print mode. |
| Color does not match the design | RIP profile, ink, or transfer conditions | Check the ICC profile, RIP settings, ink compatibility, and heat-transfer parameters. |
Where this grounding-first routine matters in textile projects
A 130 cm sublimation printer is often used where the first print has to be right: custom apparel panels, sportswear sampling, home textile designs, decorative polyester fabric, and soft signage. In those projects, a dead display or a tripped breaker does not just stop one job. It delays sampling, blocks a customer approval, and pushes production into overtime.
The XF-H1301X-1I32A1 prints at 4PASS 28 m²/h in its fastest mode on a 130 cm width. That is a useful reference for planning the first test run, but the commissioning decision is still electrical: confirm the earth path, confirm 2 kW and 110/220 V, 18 A/9 A, 50–60 Hz, and confirm the LVD documentation before the machine is treated as production-ready.
Why a checklist from a larger model should not be copied
The XF-H1301X-1I32A1 and XF-H1802X-2I32A1 share a 110/220 V supply family, but their current and power values differ. That changes the circuit check, not just the print width.
| Model | Print width | Power | Power supply | Operating environment |
|---|---|---|---|---|
| XF-H1301X-1I32A1 | 130 cm | 2 kW | 110/220 V, 18 A/9 A, 50–60 Hz | 20–35°C; 45–65%RH |
| XF-H1802X-2I32A1 | 180 cm | 3.5 kW | 110/220 V, 27.2 A/13.6 A, 50–60 Hz | 20–35°C; 45–65%RH |
Use the model-specific nameplate to set the circuit and protection check. The table is a commissioning reference, not a statement that one model is better than another.
FAQ: commissioning the XF-H1301X-1I32A1
What should I check before powering on the XF-H1301X-1I32A1 for the first time?
Complete the pre-power sequence before connecting the machine: inspect the power cord and plug, confirm the protective earth path from the plug earth pin to bare metal on the frame, verify that neutral is not used as earth, confirm the site supply matches 110/220 V, 18 A/9 A, 50–60 Hz, and check that the circuit protection is suitable for a 2 kW printer. If earth continuity fails, stop. Do not power on to see whether the fault clears.
How does the grounding check relate to an LVD certificate that cites EN 60204-1:2018/A1:2025?
The certificate is a document review; the grounding check is a site measurement. For the XF-H1301X-1I32A1, confirm that the LVD certificate in the technical file names the exact model and the applicable standard edition, including EN 60204-1:2018/A1:2025 where that is the cited edition. Then record the protective-earth continuity result on the installed machine and file it with the certificate. A passing LVD certificate does not prove that the building earth path is intact.
What supply does the XF-H1301X-1I32A1 require?
The model data lists a 2 kW power requirement and a 110/220 V, 18 A/9 A, 50–60 Hz supply. Confirm the delivered configuration and nameplate against the site before connection. Do not assume that a dual-voltage label allows any socket or extension lead.
What room conditions should be ready before commissioning?
The listed operating environment for the XF-H1301X-1I32A1 is 20–35°C and 45–65%RH. Allow the machine to stabilize after transport, keep the area clean and dry, and provide clearance around the 2220×870×1540 mm machine and the external drying system.
How do I verify that the LVD certificate applies to my exact printer?
Match the model, serial or batch reference where available, manufacturer or issuer, and standard edition across the certificate, machine label, and order documents. If the certificate names a different model or an older edition than the technical file, pause commissioning and ask the supplier to resolve the document mismatch before power-on.
What is the first test after safe power-on, and who can help if the site check fails?
After the earth and supply checks pass, power the printer without starting production, confirm normal display and safety devices, then complete ink setup, Maintop RIP configuration, nozzle check, and a test print on transfer paper. Do not begin large-scale production before test printing. If the site earth path, supply, or certificate file does not match, stop and contact xinflying technical support; the company states that it has over 50 engineers providing 24/7 online technical support. The company brochure is available for download below.
Conclusion: a smooth commissioning is a documented one
A setup meltdown is usually preventable. For the XF-H1301X-1I32A1, the sequence is clear: isolate the site, prove the protective earth path, match the supply to 2 kW and 110/220 V, 18 A/9 A, 50–60 Hz, verify the LVD documentation and the cited EN 60204-1:2018/A1:2025 edition where applicable, and only then move to ink, RIP, and the first test print.
The goal is not a longer checklist. It is a commissioning record that a technician, an electrician, and a production manager can all read. That record turns a stressful first start into a controlled handover.
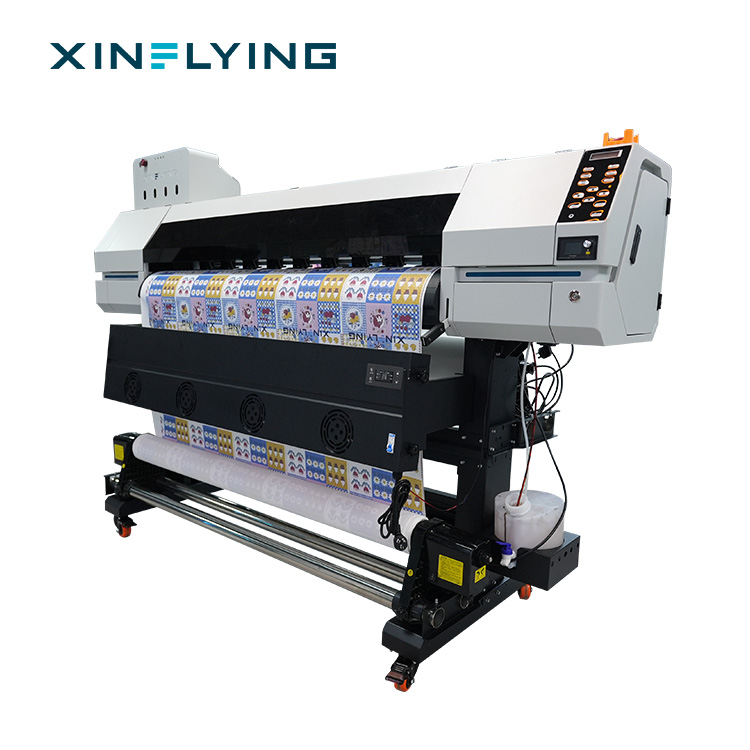
Need the full equipment overview? Download the xinflying company brochure for product and service details, or contact technical support with the model and serial number before energizing a new installation.
Have Questions or Need More Details?
Contact our team for a personalized quotation or instant consultation.
Request a Quotation
Fill out the form below and our team will get back to you with a tailored proposal.
WhatsApp Direct Chat
Prefer to chat in real-time? Message us on WhatsApp for instant assistance & quick answers.
- Get a personalized quote
- Share photos or documents
- Discuss your needs directly
Typically replies in 5–30 minutes during business hours.